This article contains links that help support this cheapest backyard pickleball court obssessed website
I always wanted a pickleball court in our backyard, but we wanted to know what was the cheapest way to build a pickleball court.
We had a had an above ground pool but when you live in upstate New York you can really only use an above ground pool 3 months out of the year.
As such, I figured we could certainly use a pickleball court from late March through early November, thus making it more practical. My wife who is the more practical member of our family would say, “we really don’t need a pickleball court as we can play at the community center and local college.”
My counter would be, “but it would be so cool!” Unfortunately, that logic didn’t offset her logic and the cost involved.
In March of 2020, everything changed with the COVID-19 lockdown. Suddenly our pickleball and exercise options were very limited. I suggested to my wife as she sat in our new home, “Say, why don’t we build a pickleball court in the yard.”
Much to my surprise she said, “Let’s do it.”
The quest for a court had begun. By the way, my wife and I have this thing where we don’t buy something unless we can buy it with cash. Therefore we wanted to make this happen we wanted it to be nice and as inexpensive as possible.
The Pickleball Court Build Process
Planning is everything. Well, it’s not everything but it’s really important.
My wife is the excellent planner in the family. I’m more of the “learn by trial and error” in other words “let’s do this” member.
Our son who was also home from law school due to the COVID mess is a great combination. My wife was teaching classes (she’s a professor at Cornell) from home and also dealing with trying to run a lab and the NYS Food Venture Center from her new home office inside our ping pong room.
Our son was studying for the bar exam. Both my wife and our son were all onboard for the court but a lot of ground work fell to me.
Step 1: Finding a spot to build the court
Finding a spot to build the court the easy part. We wanted to put the court behind the house, so it was shielded from the street.
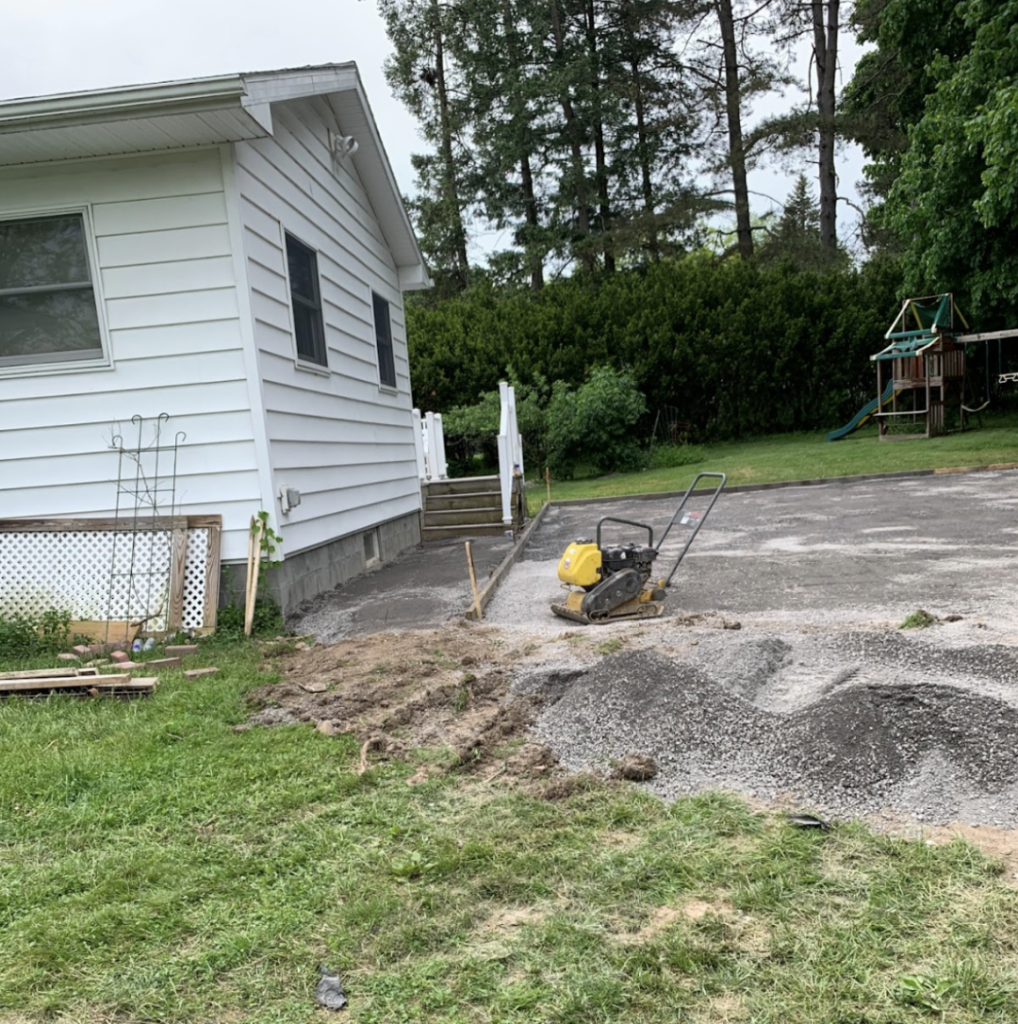
A car driving by would not notice we had a pickleball court in our yard. We just thought this would be nicer for our neighbors. This is really based on size personal preferences.
Step 2: Deciding on the surface
Since we were doing this on a budget we decided to the surface of the court would be concrete.
It was our cheapest and most available option especially when living in a small town upstate NY. There are many companies and contractors around to get quotes from, which leads me to step 3.
Step 3: Finding a contractor to lay the concrete for the backyard pickleball court
Basically, I used Google and asked around for a word of mouth referral for a contractor.
To start, I Googled masons in our area and got a pretty extensive list. I also noticed one of our neighbors had a really nice side walk poured. I asked who did that.
From there, we interviewed and got prices from 3-5 contracts. The price for the pour was pretty similar between $8,000 and $10,000.
This estimate would include the dig and the pour and the cut. We ended up going with one mason who had done our neighbors yard. He was a one man show who also worked with his grandson.
He said he would bring in extra help for the dig and a lot of extra help for the pour. At the time I had no idea why. I’m a writer / software guy I knew little about cement.
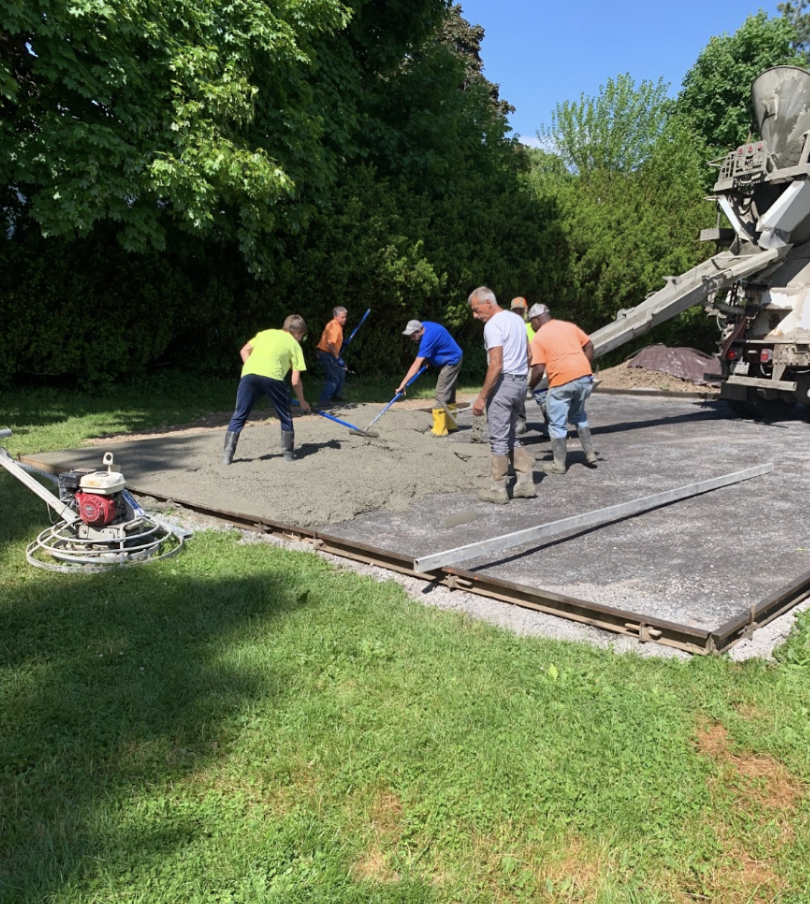
Man I would learn some stuff.
Step 4: The dig
For the dig I gave the mason the dimensions we wanted the pickleball court to be. He had not idea what pickleball was. But he knew his cement and stones. Which is what we needed. The dig. Wanted the court to be 22 feet wide and 40 feet long. (The width was a little wider than regulation because we wanted players to have room on the sides. The length was a little short as we wanted to conceal the court behind our house.) The mason came and chalked out the area.
The next day the mason, his grandson and a couple temp workers showed up with bulldozers and dug a 4-5 inch deep rectangle in our yard.
They left a huge pile of dirt behind the court. The bulldozers also made a mess of our side yard.
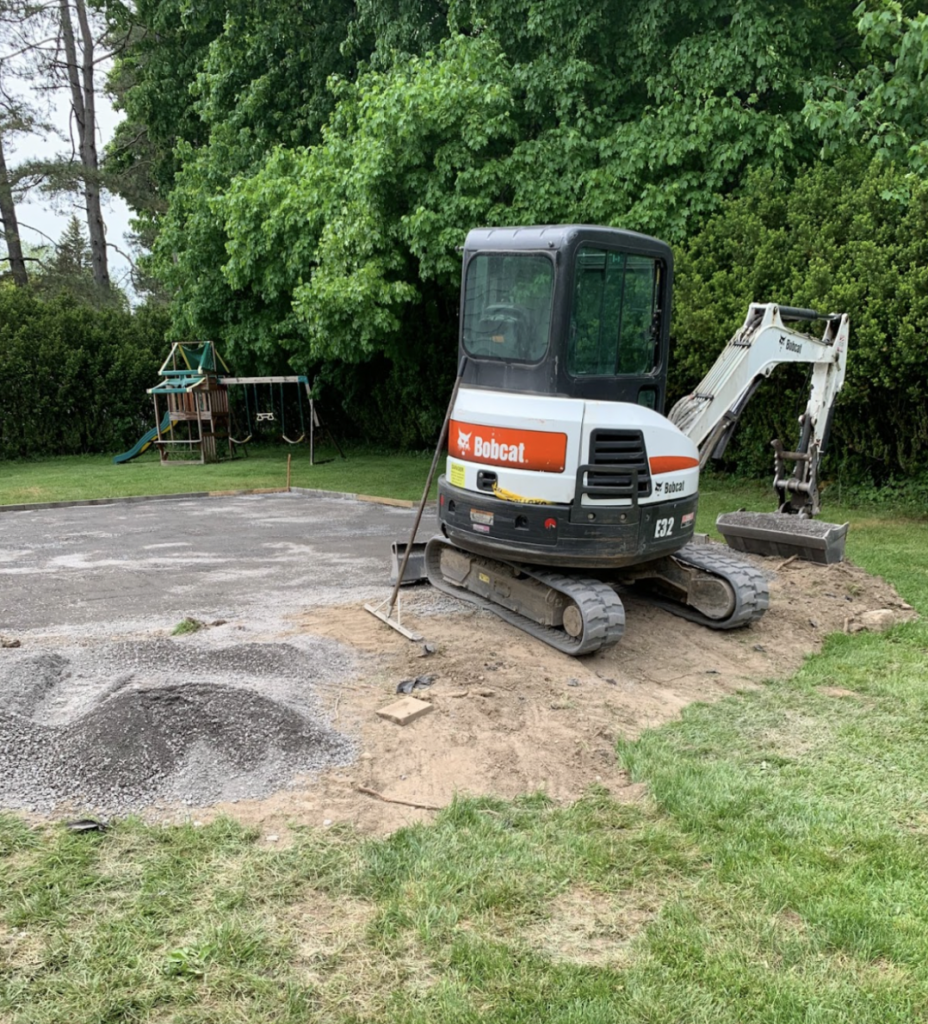
But that’s the cost having a pickleball court installed. (Especially during a pandemic.)
Step 5: The pour and cut
The poor was actually in a couple of stages. The day after the area was dug out the foundation of stone was laid. A huge dumptruck rolled into our backyard (once again doing a number on a yard) and dumped a full load of stones into the dug out area. I never asked how much do those stones weigh? (Never thought I’d be writing an article on this.)
I just asked the cost and it was about $800.
Once the stones were dumped in the contractor and his grandson and one other guy spead they out fairly evenly. Though they left east side slightly higher as the contractor told me the court would need a slight angle for water to drain off of it. The things I learned.
The next day the contractor showed up with a half dozen other guys with boots and spreaders. Then we waited and waited and waited for the cement mixer to arrive. (I’m not sure why I waited with them but my interest was peaked.) I was told once the cement itself was poured they had to distribute it evenly before it hardened. That made sense. It took them about an hour to get everything nice and smooth. But then we had a slab that would become a court.
Step 5b: The cure and the cut
Once we had our nice big slab the contractor told me now we had to wait for it to cure to help the concrete gain strength and avoid cracking. This would take a few days. My job was to water the court a couple times a day until then.
The contractor also told me that we would then have to come back and cut the concrete down the center and down the middle into four equal parts. The good news was one of the lines gave us a natural line for the net and other for the courts midline when serving. The bad news this would leave a slight dent in the court. But it gave the court personality.
Step 5c: The stain
The contractor then noted that once the court is properly cured it can be stained and sealed. This gave me a brilliant idea. I asked if the court be stained a darker color for seven feet on each side of the center line. This would make the kitchen area stand out without having to paint or line the area.
The contractor said that can be done but it will cost a couple hundred extra. I said do it. He came back the next day with stain sample and we picked out the green. It took an extra week for the green stain to get here. But it was so worth it. Once it was stained and dried we now had a pickleball court in our back yard.
The cost was around $10,000 total.
Of course we still need to paint the lines.
Step 6: The paint job
Before the court surface was even dried we started talking to painters about painting the lines. We needed a center line and sidelines. We didn’t need kitchen lines since the stain denoted the kitchen. We didn’t need a midline as the net would be there.
Surprising all the estimates were over $1,000. My wife said, “we can do this ourselves.”
We bought tape, spray paint, spray paint rollers, kite rope and a good measuring tape. We measured out where the lines should be and then ran the string from one end of the court to another.
Once the string line was down we would roll tape down both sides of the string. We piece of tape right next to the string and the other piece an inch from the string. We would remove the string then use the spray paint on the rollers to paint down the middle of the tape.
Once the paint dried we would remove the tap. Voila we had lines. Were they the prettiest most professional lines? No, but they gave more charm to the court. Plus they were affordable.
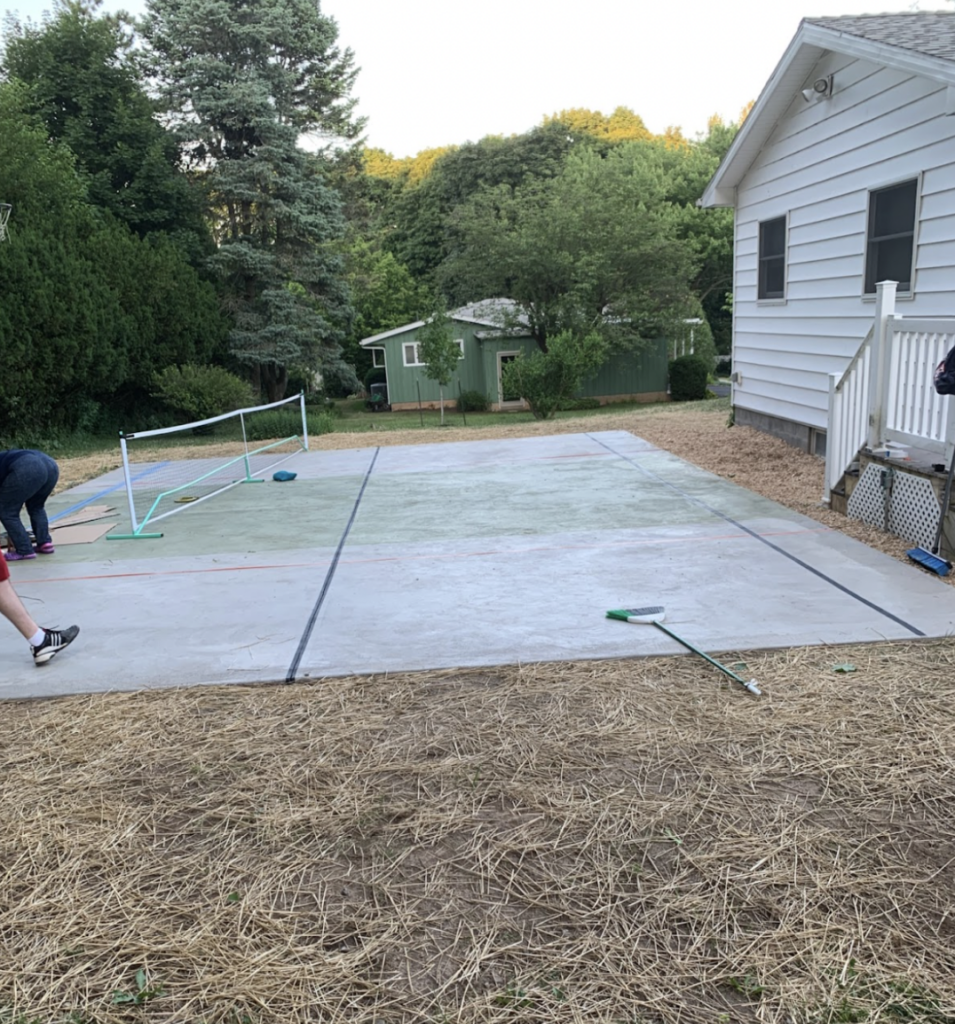
Total cost: $100 in parts
Please note there was a lot of knee work and bending in this. Our son with his younger powerlifting knees was very helpful.
Step 7: Lighting
We also found the cheapest way to put in pickleball court lighting. Since the court is right next to our house we put a nice LED flood light that shines on the middle of the court.
We then also put up to portable flood lights on each side.
Total cost: $200
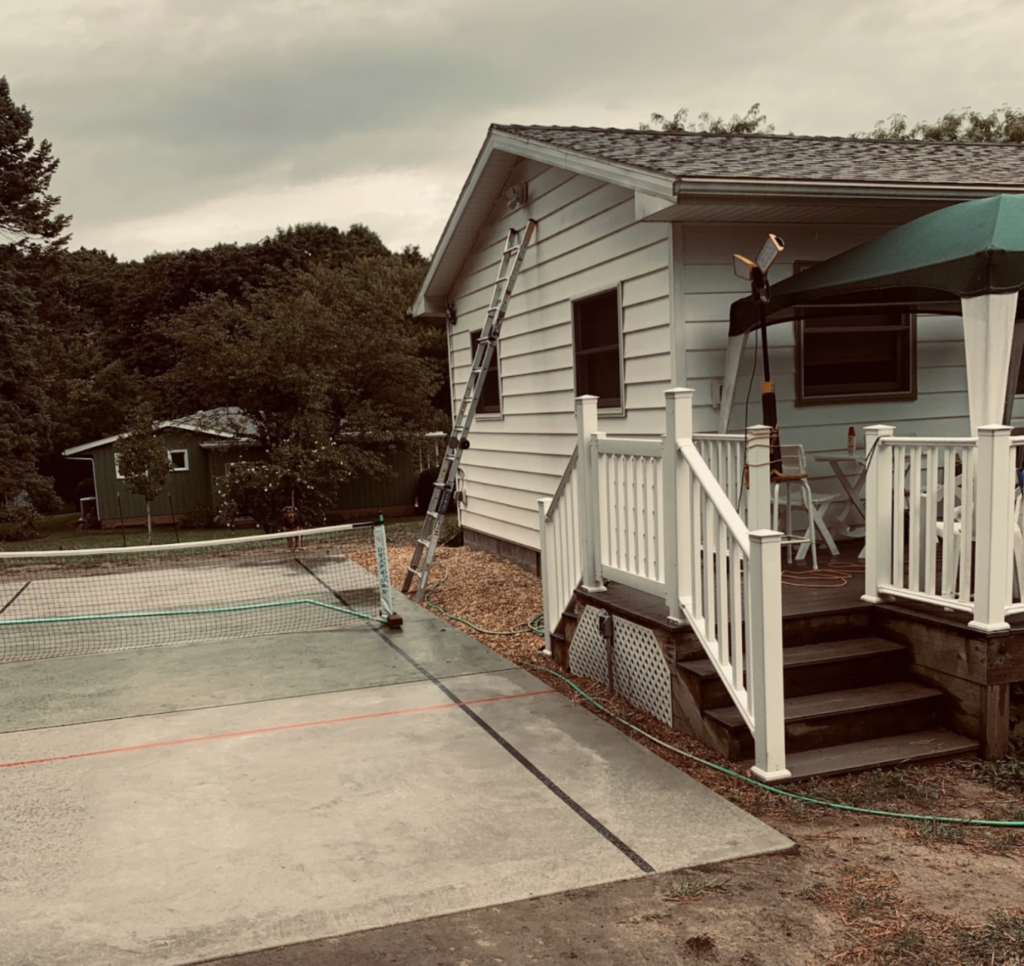
Next year, we plan to add the alta lights to the other side. The price of these lights are slightly more pricey, but these lights have a 20’x20′ coverage.
Incedible.
The cost of these lights may be around $400 on Amazon, but I actually checked recently and the price may now be below $350.
You can also check out Amazon for other options.
Step 8: The nets
As for the net we don’t need a fancy net. Since the court is also a nice basketball court we wanted a portable net. You can find some of the best pickleball portable nets for a price under $300.
For example, you could find an amazing A11n professional pickleball net on Amazon for under $200.
If you would rather to find another net, you can search amazon or for that matter Temu for pickleball nets. You can find a great pickleball net for a range from $90 to $1000.
4 things I wish I knew before we started.
1) You need more room than you think.
That’s right, you need more room than you think you do.
The actual court size is 20’ * 44’ but you need at least 3 feet around all sides of the court. This is so you have room to serve and also don’t run into anything when chasing a ball.
That would be bad. We learned this the hard way.
Therefore, we needed a second dig and pour to lengthen the court. This was our bad for not planning better and also trying to save some money by making the court as small as possible.
The second dig ended up costing us more when we would later add on an extra yard on each side.
2. Consider fencing in the court
You may need to fence the court in.
In fact, you probably do.
When we built our court it had three natural fences. We had the house on south side, and bushing lining the yard on the north and west side.
But, the east side is wide open and on a bit of a slant thanks to the dirt that was removed to make the court. The ball can roll a long way.
We bought a fence to string up to block to the ball, but it really made it a pain for our yard guy to cut the grass.
We decided we would leave that side open and just occasionally walk to get the ball. Thankfully, walking gives us some extra steps in our day.
3. Understand the mess
Building the cheapest backyard pickleball court is messy.
In our case they needed a lot of heavy equipment to dig out the ground and then to pour the cement.
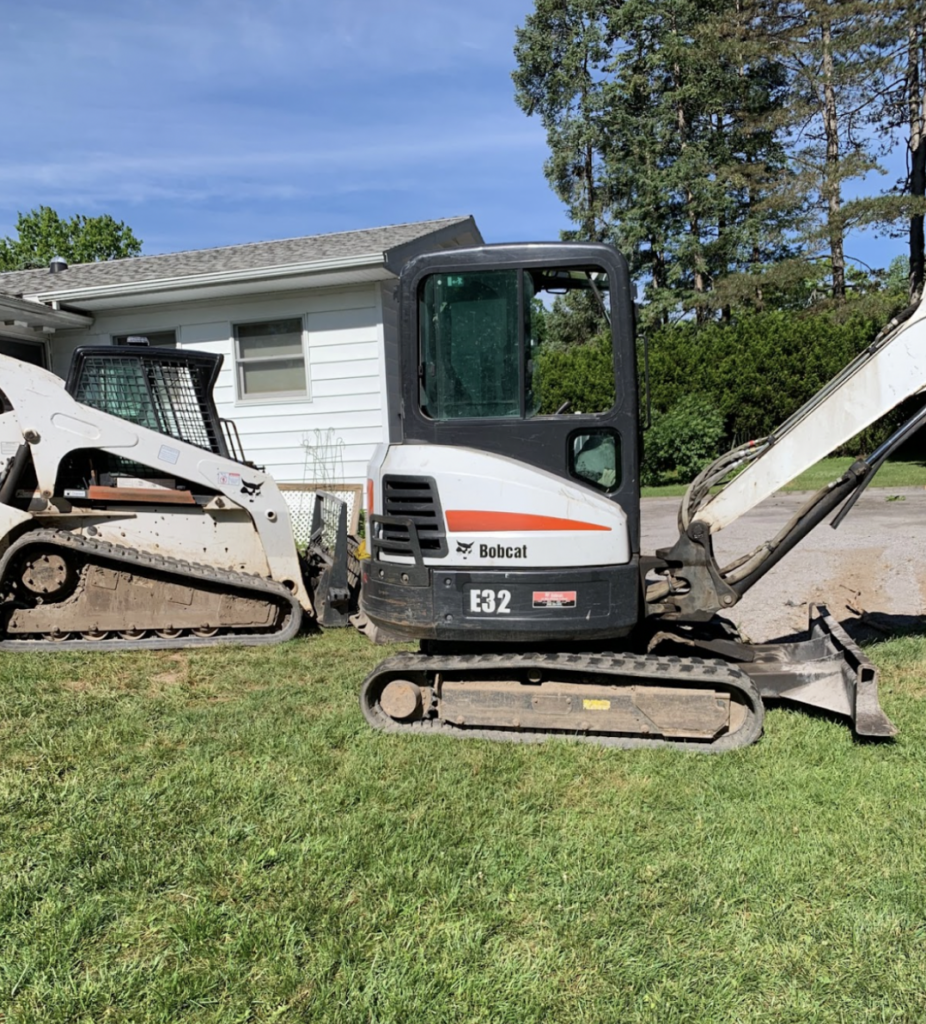
This made a huge mess of our yard as a lot of these machines are very big and dig up yard just moving to the area they need to dig up.
4. Understand the lights you will need and the noise
Please understand that you need lights for both sides of the court.
Also, understand the noise in addition to the lights
Being a pickler the noise is just part of game and you tend to get used to it. Yet, we have neighbors who aren’t picklers so we didn’t want to drive them crazy with bonk bonk bonk.
Or for that matter the talking and the cheering and such. The cheering could really be a problem at night since we wanted to put lights on the court.
Breaking Down the Cost of A Court
Now to get more general. If you don’t want to go the build it yourself way you can hire companies that come in and specialize in building courts.
Construction and Installation Costs
The overall cost of building a backyard pickleball court varies based on numerous factors.
Building a pickleball court typically costs between $15 and $40 per square foot. This means a standard court will cost between $13,200 to $35,200 depending on materials, location, and installation costs involved.
According to the internet, the average cost to build a single pickleball court is around $35,000.
Here are key factors to affect the price:
- Surface material: Acrylic hard courts are usually the most affordable option, while premium surfaces will certainly increase the price. These prices can vary by local.
- Labor costs: Professional installation and site preparation can significantly impact the total cost. But it does make the job way easier on you. Court surface cost: $10,000 – $25,000
- Nets and Posts: This can really range in price depending on what you want. For the most part a portable $100 – $200 net will work just fine. But for fancier nets and posts you can pay up to $750. Nets and Post Costs: $100-$750.
- Lighting: Adding a perimeter fence or court lighting will add to the overall cost. But the lights are super useful for extending court time. There are some very workable $300 dollar options for portable battery powered lights but for fancier permanent lights the costs can get into the thousands. Lighting (if added): $1,000 – $10,000
- Fencing: The importance of fencing depends on your location. As stated earlier with our court we had some natural fences. We left one side fenceless which means occasional we need to walk more for a ball. Fencing: $2,000 – $6,000
- Location and permits: Local regulations and building permits can vary the price.
How to Save on Pickleball Court Costs
- Shop around for the best prices
- Consider doing some of the work yourselves
FAQs About Pickleball Court Costs
Let’s cover some FAQs to consider.
Approximately How Much Space Do You Need for a Pickleball Court?
The official playing area is 20 feet by 44 feet. It is recommended (and wise) to have 30 feet wide by 60 feet long. You do need space and obviously the more space you have the better.
Ideally the court is fenced in. Thankfully, ours has a natural fence on three sides.
Can You Convert a Tennis Court into a Pickleball Court?
Yes, in fact you can comfortably convert one tennis court into four pickleball courts if you want to pave over the court. In fact our local high school just turned their old tennis courts into a dozen pickleball courts.
Our towns house school had 5 tennis courts for the teams to play at. They were okay courts until the town had a family come in with three sons who were all potential state champions. (Two of them have been state champion and have played or will play Division 1 tennis.) Suddenly the old courts weren’t fitting. The school invested in nice new courts. The pickleball community here said, “Hey can we turn those old courts into pickleball courts?”
The school system and the town both said, “let’s do this.”
The local pickleball community brought plans to both the school board and the town council.
How to Resurface Tennis Courts
The simplest and least pleasing option would have been to paint or tape pickleball lines over the tennis court courts and play with the old tennis nets. Or maybe remove the nets and put in rolling pickleball nets.
The better option was to totally resurface the courts and turn 5 tennis courts into 8-20 pickleball courts depending on how we wanted to lay them out. This option would cost between 30 and 50K.
After much back and forth, the town decided to resurface the tennis courts and turn them into 8 nice new pickleball courts. They of course put out a call for bids and hired a company from a bigger city. Once the company was chosen the courts were resurfaced and painted. The bicker and bidding process took way longer than the build.
Adopting a Court Campaign
We did a adopt a court campaign to raise money for nets. We asked people to contribute $250 to buy a net which would be named after them.
We bought eight sliding nets. That can easily be moved around.
This was the school system can still use the space for non-pickleball events.
Are There Funding Options for Building Courts?
Actually there are grant options if your city is considering to build to pickleball court.
Google will be your friend.
Though our city has a program where they give “home beautiful money” to people who want to make their homes look nicer.
One city official told me they probably would have included out pickleball court.
So your results may vary.
Should You Put In a Cheap Backyard Pickleball Court?
Understand the cheapest way to put in a backyard pickleball court, ranging from the court materials to the lights to the nets.
Hopefully, my story will help you understand whether building a court is right for you.
For me, it absolutely was worth putting in a court.
